A client contacted me to refinish 2 dressers she received for FREE from a friend. These dressers will find a home at her new beach house once its completed this summer. I am disappointed to say that I can't find a before of the first dresser. This is definitely my favorite. This dresser had a Cherry Stain with Large wooden knobs. I sanded the entire piece and painted with CeCe Caldwell's Young Kansas Wheat Paint. I love CeCe Caldwell's because it is a GREEN paint! Their website says, there are "no Volatile Organic Compounds, are non-toxic and have no odor. The paint contains NO acrylic co-polymers, solvents, formaldehyde, ammonia, ethylene glycol or toxic heavy metals. The minerals are clay, porcelain clay and chalk blended into a water based solution. The paint is packaged in recycled plastic containers". I think this paint is a win for everyone!
I switched the hardware out for acrylic knob and I really think this made the transformation. I gave it a light distressing and am happy with how it turned out. I'm just upset I wasn't able to get a higher quality photo before my client picked it up.
This next dresser was a really tricky piece. Probably one of the toughest piece I've done in the couple years I've been working on furniture. Here are the before pics--the dresser was covered in black paint with a high gloss finish.
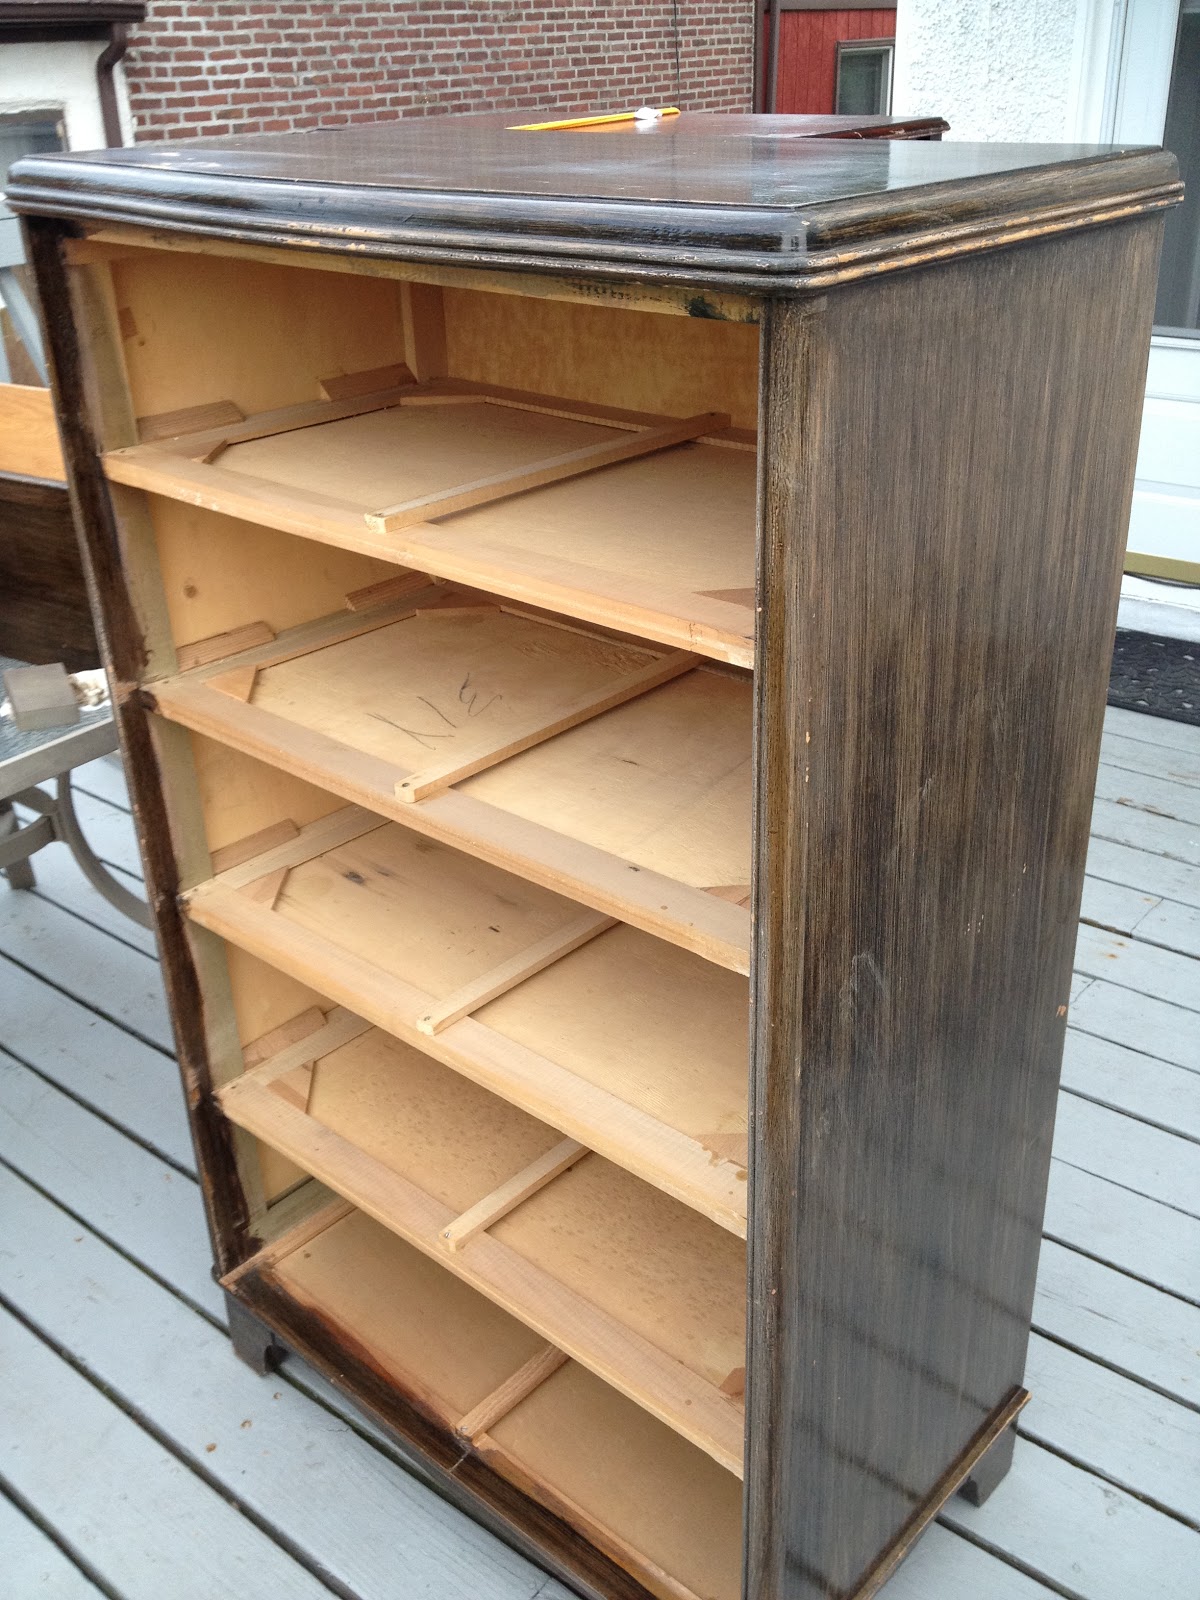
The handles don't come off and made it difficult to give it a true transformation. I worked with CeCe Caldwell's Cottonwood Sienna for this piece. Compared to the other CeCe's paint I have worked with, this was by far the most thin and hard to work with. I coated this dresser with anywhere from 4-6 coats depending on the location--and this is with completely sanding it! I think it was a combo of the thin paint and the harsh finish that was on the wood before I received it. Before putting the water based polyurethane the dresser had a very matte/chalkie/dull look to it. The poly really helped in adding texture to the finished piece and giving it a wood grain look---harder to see in the pics than in person-especially since these were taken quickly with the iphone and not my usual camera.
***Also, the top right hand corner of the bottom drawer is still wet in this pic, so please forgive the slight difference, but I wanted to grab a pic quickly!**
I love redoing furniture for other people. I hope my client is happy with how they turned out and that they love their new home at the beach!
Dani
Wednesday, June 6, 2012
CeCe Caldwell Painted Dressers
Labels:
cece caldwell,
client pieces,
painted furniture
Tuesday, May 8, 2012
Our Living Room BEFORE we moved in!
Hi All,
Sorry for the short hiatus...life just happened! We've been traveling for work and all kinds of craziness, but I do have lots of things to share. Let's start with our Living Room. We moved into our house a little over a year ago. We LOVE it here. I know I've said it before, but our house is wood...all wood!! It's an historic house built in the 30's and we couldn't be happier here, but a house of all wood does present some challenges in the decorating area, but we love a challenge.
Here are a few pics of our Living Room right before we moved in...
A lot of wood, right? Wood floors, wood walls, wood windows and a manly stone fireplace (which is amazing, just hard to make look pretty!). This week I'll show you how we made this very masculine cabin into something that works for both me and my husband. Here is a sneak peak of our couch and rug--
Our couch is from West Elm and we picked up our rug online at RUGS USA
We love how the room is coming together. I can't wait to share our progress with you all!
Danielle
Sorry for the short hiatus...life just happened! We've been traveling for work and all kinds of craziness, but I do have lots of things to share. Let's start with our Living Room. We moved into our house a little over a year ago. We LOVE it here. I know I've said it before, but our house is wood...all wood!! It's an historic house built in the 30's and we couldn't be happier here, but a house of all wood does present some challenges in the decorating area, but we love a challenge.
Here are a few pics of our Living Room right before we moved in...
A lot of wood, right? Wood floors, wood walls, wood windows and a manly stone fireplace (which is amazing, just hard to make look pretty!). This week I'll show you how we made this very masculine cabin into something that works for both me and my husband. Here is a sneak peak of our couch and rug--
Our couch is from West Elm and we picked up our rug online at RUGS USA
We love how the room is coming together. I can't wait to share our progress with you all!
Danielle
Monday, March 26, 2012
Retail DIYet Featured!!
The Retail DIYet's was featured on Serendipity and Spice's Manic Monday Link Party!!
Thanks, Melissa!!
Labels:
featured,
Paris Gray,
serendipity and spice
Wednesday, March 21, 2012
Customizing an IKEA bookshelf
We purchased this IKEA bookshelf years ago when we moved to Los Angeles.
When we moved to Nashville we brought it with us, but it did not travel well! The back of the shelf has a cardboard/particle board thingie (very technical term!) that holds the entire shelf upright and after the move it split. We tried to repair it with tape (why?? I don't know?), but it just wasn't working. We didn't want E to grab onto it and the whole thing come toppling down on her. Instead of throwing her out I decided to try and fix the old girl.
I painted the shelf with Annie Sloan's Chalk Paint in Paris Gray. I wasn't sure if it would work since I have never really painted anything with Chalk Paint that wasn't real wood. Needless to say ASCP worked wonders! Here is a picture with the frame painted. Sorry for the blurriness.. I snagged this with my phone which usually takes better pictures than this, but I guess the only one to blame is the photographer...
I wanted to do something with the back of the shelf so I had some thin paneling type board (again..so technical around here) cut from Home Depot. I wasn't going to tell you all this, but I will go ahead and be honest. I had to buy it and have it cut twice, since apparently I can't use a measuring tape. It cost about $9.00 (times 2 = $18) for the back board. I then covered the panel with fabric I got at Joann's with a 50% off coupon. Total for the fabric came to about $10.00. I used about 2.5 yds. I used spray adhesive to hold the fabric onto the paneling and then nailed the back in place.
Now that I'm looking at the shelf I am really loving the fabric on the back and the splashes of red. I'll be posting all about or home office re-do shortly, so stay tuned for that.
Danielle
Linking up to these fabulous parties!
Wow Us Wednesday @ Savvy Southern Style
Whatever you want Wednesday @ Free Pretty Things for You
Wednesday's Wowzers @ Oopsey Daisy
Open House Party @ No Minimalist Here
Inspired Creations Link Party @ Embracing Change
Thrifty Things Friday @ The Thrifty Groove
Furniture Feature Friday @ Miss Mustard Seed
Furniture Friday @ Decorating Insanity
Under $100 Link Party @ Beyond the Picket Fence
Friday Feature Party @ Redoux
Catch as Catch Can @ My Repourposed Life
LaThrifta's Cheap Finds LaThrifta's Cheap Finds @ The Scott's Crib
Saturday Night Special @ Funky Junk Interiors
Sunday Showcase @ Under the Table and Dreaming
Nifty Thrifty Sunday @ Nifty Thrifty Things
Manic Monday Link Party @ Serendipidity & Spice
above image courtesy of IKEA
I painted the shelf with Annie Sloan's Chalk Paint in Paris Gray. I wasn't sure if it would work since I have never really painted anything with Chalk Paint that wasn't real wood. Needless to say ASCP worked wonders! Here is a picture with the frame painted. Sorry for the blurriness.. I snagged this with my phone which usually takes better pictures than this, but I guess the only one to blame is the photographer...
I wanted to do something with the back of the shelf so I had some thin paneling type board (again..so technical around here) cut from Home Depot. I wasn't going to tell you all this, but I will go ahead and be honest. I had to buy it and have it cut twice, since apparently I can't use a measuring tape. It cost about $9.00 (times 2 = $18) for the back board. I then covered the panel with fabric I got at Joann's with a 50% off coupon. Total for the fabric came to about $10.00. I used about 2.5 yds. I used spray adhesive to hold the fabric onto the paneling and then nailed the back in place.
Now that I'm looking at the shelf I am really loving the fabric on the back and the splashes of red. I'll be posting all about or home office re-do shortly, so stay tuned for that.
Danielle
Linking up to these fabulous parties!
Wow Us Wednesday @ Savvy Southern Style
Whatever you want Wednesday @ Free Pretty Things for You
Wednesday's Wowzers @ Oopsey Daisy
Open House Party @ No Minimalist Here
Inspired Creations Link Party @ Embracing Change
Thrifty Things Friday @ The Thrifty Groove
Furniture Feature Friday @ Miss Mustard Seed
Furniture Friday @ Decorating Insanity
Under $100 Link Party @ Beyond the Picket Fence
Friday Feature Party @ Redoux
Catch as Catch Can @ My Repourposed Life
LaThrifta's Cheap Finds LaThrifta's Cheap Finds @ The Scott's Crib
Saturday Night Special @ Funky Junk Interiors
Sunday Showcase @ Under the Table and Dreaming
Nifty Thrifty Sunday @ Nifty Thrifty Things
Manic Monday Link Party @ Serendipidity & Spice
Thursday, March 15, 2012
Gray Desk ReDo
Me and the hubs found this desk at a thrift store recently and as soon as we saw it we knew it would be perfect in our office. I frequent the thrift store A LOT and this was by far the cleanest, most organized store I have ever been to. The staff came up to help us as soon as we walked in and kept checking back with us. They were fabulous. We picked this up for $40.00. Solid wood and in perfect condition except that it was ugly, but I could fix that so I wasn't worried.
Here she is before...
Disregard the leaves on my basement floor....
Here is a close up of the handles and the newspaper under is the liner of the drawers. Cute, right?
I soaked these handles before I sprayed them with Rustoleum Lagoon Spray Paint
And here is the after...
I painted this desk with Annie Sloan's Chalk Paint in Paris Gray. I sprayed the hardward with Rustoleum Spray Paint in Lagoon. I usually always wax my chalk paint pieces, but I decided to try and polyurethane this piece and I actually love how it sealed it.
Not bad for $40.00 since I already had all of the paint on hand for other projects!
Linking up to these parties:
Open House Party @ No Minimalist Here
Thrifty Things Friday @ The Thrifty Groove
Furniture Friday @ Decorating Insanity
Furniture Feature Friday @ Miss Mustard Seed
Frugalicious Friday @ Finding Fabulous
That's The Ticket Blog Hop @ Lovely Etc
Manic Monday @ Serendipity & Spice
Nifty Thrifty Sunday @ Nifty Thrifty Things
Motivated Monday @ Be Colorful
Power of Paint @ Domestically Speaking
Be Inspired @ Elizabeth & Co
Wow Us Wednesday @ Savvy Southern Style
Whatever you want Wednesday @ Free Pretty Things for You
Wednesday's Wowzers @ Oopsey Daisy
LaThrifta's Cheap Finds @ The Scott Crib
Under $100 Link Party @ Beyond the Picket Fence
Friday Feature Party @ Redoux
Catch as Catch Can @ My Repourposed Life
Here she is before...
Disregard the leaves on my basement floor....
Here is a close up of the handles and the newspaper under is the liner of the drawers. Cute, right?
I soaked these handles before I sprayed them with Rustoleum Lagoon Spray Paint
And here is the after...
I painted this desk with Annie Sloan's Chalk Paint in Paris Gray. I sprayed the hardward with Rustoleum Spray Paint in Lagoon. I usually always wax my chalk paint pieces, but I decided to try and polyurethane this piece and I actually love how it sealed it.
Not bad for $40.00 since I already had all of the paint on hand for other projects!
Linking up to these parties:
Open House Party @ No Minimalist Here
Thrifty Things Friday @ The Thrifty Groove
Furniture Friday @ Decorating Insanity
Furniture Feature Friday @ Miss Mustard Seed
Frugalicious Friday @ Finding Fabulous
That's The Ticket Blog Hop @ Lovely Etc
Manic Monday @ Serendipity & Spice
Nifty Thrifty Sunday @ Nifty Thrifty Things
Motivated Monday @ Be Colorful
Power of Paint @ Domestically Speaking
Be Inspired @ Elizabeth & Co
Wow Us Wednesday @ Savvy Southern Style
Whatever you want Wednesday @ Free Pretty Things for You
Wednesday's Wowzers @ Oopsey Daisy
LaThrifta's Cheap Finds @ The Scott Crib
Under $100 Link Party @ Beyond the Picket Fence
Friday Feature Party @ Redoux
Catch as Catch Can @ My Repourposed Life
Labels:
Annie Sloan's Chalk Paint,
DIY,
painted furniture,
Paris Gray
Retail DIYet was featured and The Liebster Award!
I was so excited to be featured over at the POWER OF PAINT. I love that site and was so excited to see my Aqua Hutch sharing a post with another great project.
I was also given The Liebster Award...by two blogs that I read all the time. Thank you so much, Kelly @ Lake Murray Cottage and Mr. Smith over at The Smith Garage.
Here's the skinny on the Liebster Award...
I was also given The Liebster Award...by two blogs that I read all the time. Thank you so much, Kelly @ Lake Murray Cottage and Mr. Smith over at The Smith Garage.
Here's the skinny on the Liebster Award...
A Liebster Blog Award is given to talented and loved bloggers who have less than 200 followers.
Just a few rules:
Thank your Liebster Blog Award presenter on your blog.
Link back to the blogger who presented the award to you.
Copy and paste the blog award on your blog.
Present the Liebster Blog Award to 5 blogs of 200 followers or less who you feel deserve to be noticed. Let them know they have been chosen by leaving a comment at their blog.
Here are the blogs that I am sharing this cool award with. Check them out and share the blog love!
I have lots of good projects coming your way so stay tuned!
Danielle
Sunday, March 4, 2012
A quilt for a Friend
My parents are amazing quilters. Yes, my parents...not just my mom. If you were to see my dad there is no way you would take him for an amazing quilter, but he is. It started as therapy. He has had so many problems with his hands and had to go out of work on disability. He could/can barely pick up more than a couple pounds without a struggle. Going from a hands on, athletic guy to that was difficult to say the least. One day my mom asked him for a favor. She asked him to cut fabric for a quilt she was working on. He used a rotary cutter instead of scissors of course and from then on it just kind of stuck. He cut so much fabric she couldn't keep up! He was tired of waiting for her so he taught himself to quilt...with her help and guidance of course! He uses a rotary cutter and a quilting machine to help with his hands. He doesn't do the hand stitching, my mom still does that, but everything else is his. My parents make beautiful pieces from quilts to table runners, to bags, place mats...you name it! Here is a link to our family Etsy store...Porter Handmade most of the stuff up there is xmas themed, but new items will be added shortly. The two of them together are a perfect team...in quilting and in life. They are amazing people, and even better parents and I am so lucky they are mine!
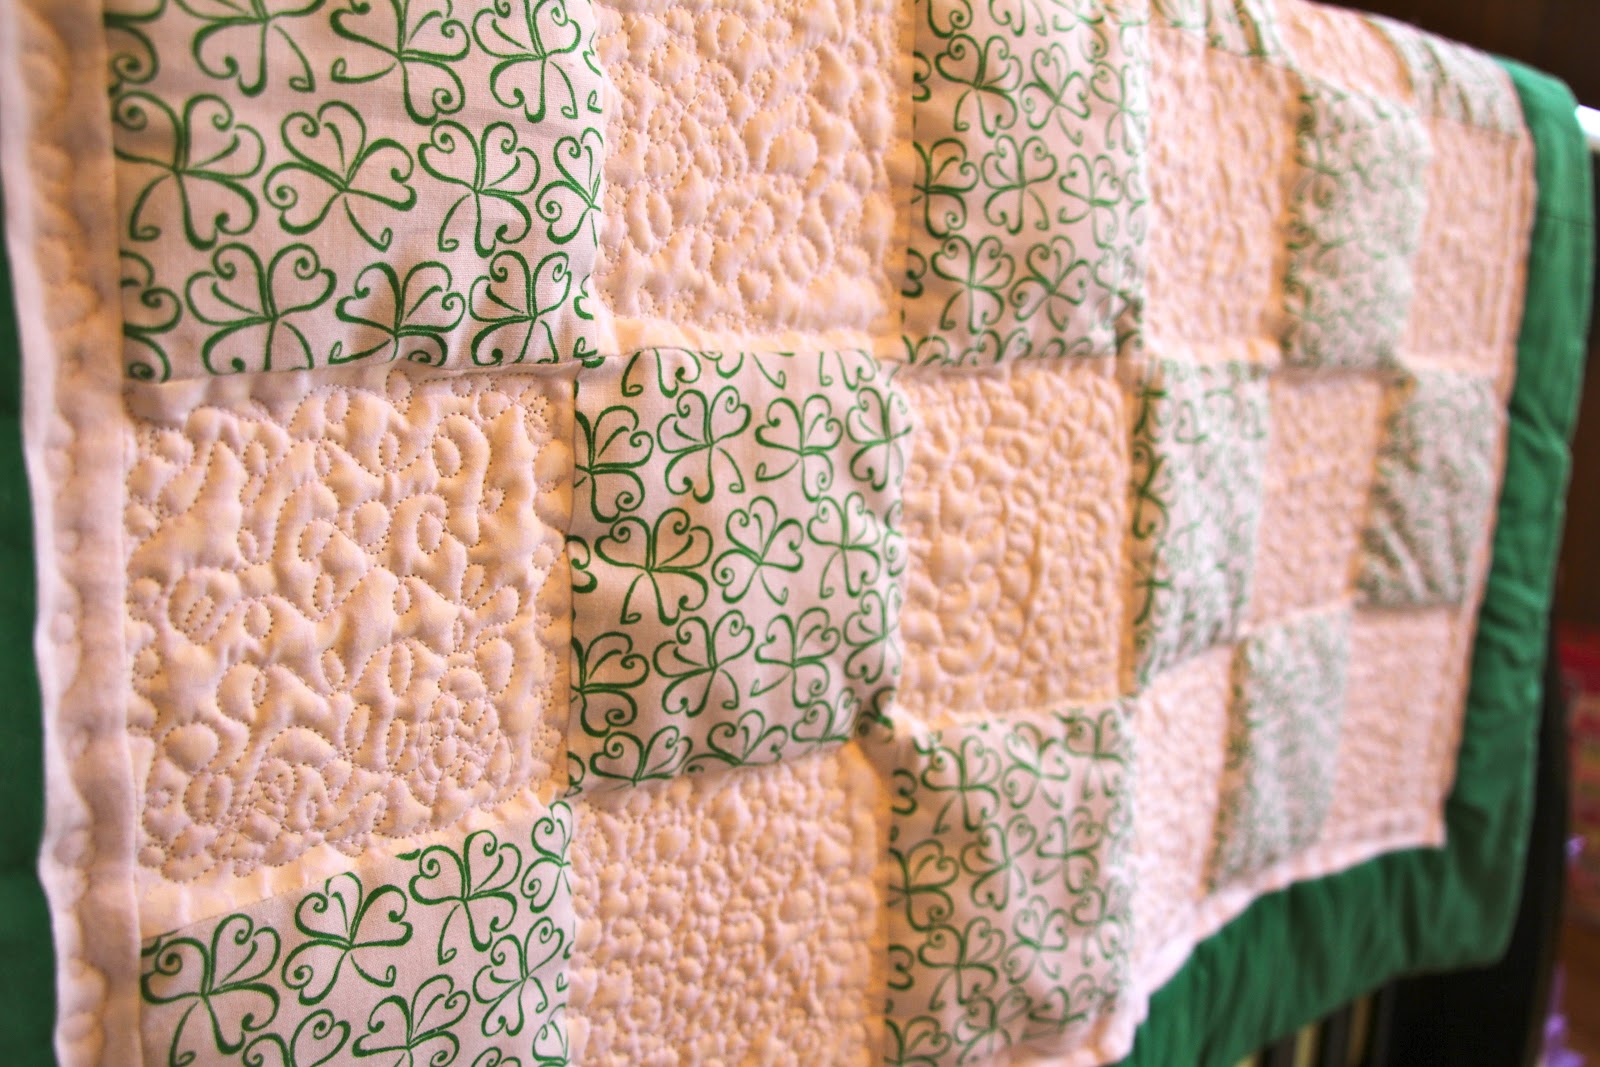
Fortunately for me they have been teaching me the craft for a bit now. Before every time a friend would have a baby or get married I would ask them to make me a quilt. That is no longer the case! I can now make them myself. Here is one I made for my friends Lindsey and Cory who are expecting their first child on St. Patrick's Day! They have made a lovely Irish themed nursery so I hope the quilt will go nicely with their theme. I know the greens they picked are more pastel and soothing, but here is my Irish quilt made especially for Baby M who I can't wait to meet in March!
I didn't use a pattern really..just the block method. I usually wing things...I hate sticking to patterns or instructions. Exactly why I can cook, but not bake. I have no patience for things like that!
I used the quilting machine to give this some texture. You can't really see it in the photos, but the white fabric also has white shamrocks.
This is the back--I used a white flannel for the back.
I know its far from perfect, but I do hope that Baby M will enjoy it!
Danielle
Linking Up to these fabulous parties:
Whatcha Got Weekend @ Lolly Jane
The Sunday Showcase Party @ Under the Table and Dreaming
Just Something I Whipped Up @ The Girl Creative
TNT Thursday @ Happy Quilting
| This year they will be married 38 years! They don't look old enough for that do they? |
I didn't use a pattern really..just the block method. I usually wing things...I hate sticking to patterns or instructions. Exactly why I can cook, but not bake. I have no patience for things like that!
I used the quilting machine to give this some texture. You can't really see it in the photos, but the white fabric also has white shamrocks.
This is the back--I used a white flannel for the back.
I know its far from perfect, but I do hope that Baby M will enjoy it!
Danielle
Linking Up to these fabulous parties:
Whatcha Got Weekend @ Lolly Jane
The Sunday Showcase Party @ Under the Table and Dreaming
Just Something I Whipped Up @ The Girl Creative
TNT Thursday @ Happy Quilting
Labels:
baby quilt,
etsy,
family,
handmade,
quilt
Subscribe to:
Posts (Atom)