Wednesday, December 7, 2011

Burlap Stockings

If you read about my Thanksgiving Post then you know about the coffee bean sacks we used for table runners.  I love these and was trying to think of other uses for them, hence this post.  I decided to make stockings for our mantle out of them.  I'm pretty happy with how they turned out.  They definitely got better as I kept making them.  It was really just trial and error since I didn't work from a pattern or anything.  Just an old stocking I think I picked up at Target maybe 10 years ago.

I started by tracing the old stockings onto the burlap and cutting them out

 Then I loosely traced the stocking onto brown felt to line the stockings.  Make sure they are a little larger than the burlap cut outs--trust me...just do it! 

You'll need to sew these inside out and backwards of course!
Just turn them back to right side out and you'll be set!


 Yes--that is a huge fish over my fireplace...I'll share his story another day. 
This project cost me nothing since I already had these materials on hand.  Can't beat free decor!  I'll also post more on the JOY letters later.  It's a simple and quick DIY I found on pinterest (Yes, I am obsessed with Pinterest!  Who isn't?) and it cost under $7.00!
Danielle

Thursday, December 1, 2011

Easy DIY Children's Toy

I saw something similar to this at our local Library.  They had a big felt board with all different types of fruit and veggies that the kiddo's could play with and rearrange.  Here is my holiday version.  It cost next to nothing since I had all of the supplies on hand, but if you were to buy felt you can purchase small sheets of felt for just a couple of cents.

I started with this $2.00 frame that I picked up at my favorite thrift store.  I had originally wanted to turn this into a chalk board for Emmi, but I have so many other ideas for it.  I actually have kept it in front of my fireplace for a couple months.  I like the weirdness of it. 
I took the actual painting out and covered it with red felt.  I didn't staple anything into the painting or the frame so no harm done to anything and it can easily be changed out or returned to the original state.
Next I just started making shapes--excuse the horrible job, but I did this all freehand!
Aside from being a cool thing for kids to play with this is also a way to learn and discuss colors, shapes, holidays and seasons!

Here is also another version for fall...

xo,
Danielle

Tuesday, November 29, 2011

My First Thanksgiving Dinner


My turkey's 
Hosting our First Thanksgiving
My sisters, Lilly and Mia 

Our table is set

I hope everyone enjoyed thier Thanksgiving.  Ours was a success! This was our 1st Thanksgiving in our new home.  My family usually spends Thanksgiving at my parents house, but since they recently sold thier house Eric and I decided to take over. My whole family was there and we really enjoyed having everyone at our house. We set the table with gold chargers (Michaels) 2.99 with 40% coupon... my mom already had 8 so I only had to purchase 2 more :) I finally got to use my Italian Countryside china that I recieved for my wedding 6 years ago... I found cream napkins with gold embroidery at homegoods for 6$ and wrapped them with various napkin rings... mom gave me about 5 and I found some at homegoods and pier one for about $1.50.  I added a few tea lights in gold votives that I got at Target for .99.

almost ready...
My 1st Turkey 
Mom & I cooking

I enjoyed cooking for my family. I made my own "stuffing bread" in my bread machine.. cut it up into cubes and voila! I recommmend baking your own bread to prepare stuffing... it turned out amazing!


Thanksgiving

I hope you all had a wonderful Thansgiving.  Ours was amazing!  My sisters and their men came down as well as my parents.  We had such a great time setting up and cooking dinner.  Our goal was to utilize as much as we had around the house to decorate with.  If we didn't have it in house (minus the table and chair rentals) we tried to come up with cheap creative solutions.  Hope you enjoy!


Here are the boys setting up the table
Hanging some lights
We used burlap coffee sacks for the table runners.  
We cut the burlap coffee sacks into long table runners.  We got these for $1.00 at our local coffee place-Bongo Java.

My talented and amazing sister made the place cards which we tied onto a white handkerchief with some twine.

Our small bites were put into plain brown paper bags.
We used our Chalk Board that I did in THIS post to display the menu
We dubbed our Thanksgiving-"NASHgiving"


 We would love to see other Thanksgiving feasts!  Feel free to email us pictures which we will post for you or link to your blog in the comments.
Danielle

Monday, November 7, 2011

Chalk Board Art

I hope everyone had a fabulous weekend.  Two of my very best friends came to visit and we had such a good time!  I loved having them here and was sad to see them go.  Before they arrived I found this frame at my favorite Goodwill Store and had to snag it up.  It was $4.00--no brainer.


I had definite plans for it.  I've been listening to my Avnett Brothers CD a lot in the car and I wanted to do something with one of their lyrics, so this is what came of it.

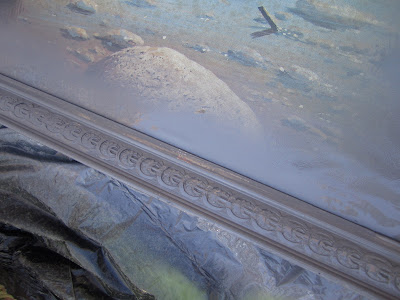
First I spray painted the frame with Rustoleum Granite in a Satin finish.


I then painted over it with Annie Sloan's Chalk Paint in Paris Grey.  I wanted you to be able to see the contrast and make it look a little worn, so I distressed in a few places.

I used a piece of plywood and cut it to fit where the old beautiful (ha) photo was.
 I painted the plywood with chalk board spray paint and secured it into the frame.


 For under $15.00 you have a great piece to put in your home.  Tine and I talked about it and this would be great for Thanksgiving to put the menu or for everyone to write what they are thankful for.

xo, dani